Contributed by:
Flowerman
Submitted: 05-09-2002
"Step by step
cooler DWC" 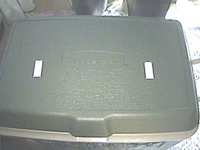
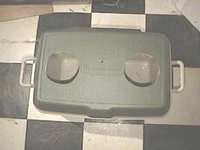
The first step is, selecting a cooler,
and each has its own good and negative qualities. For
this faq, I will be using a 48qt Rubbermaid, though I
prefer the igloo coolers the best. The dark green
exterior of the cooler will help block light more than a
yellow, or even a white.
They all should have
insulation between the plastic, to help maintain the
right water temperature. Also, if you want, you can use
black electrical tape, pvc plumbing tape, or duct tape,
to help keep light out.
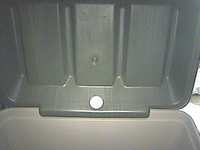
I should point out with
the Rubbermaid, you will have to add paper, or duct
tape, to cover up the hinge on the Rubbermaid. Light can
get in there. Igloo coolers don?t have this problem.
Other good coolers to use: the 48qtr cooler by
Coleman/igloo. They have wheels, easy pull handle,
(which makes it easy pulling it out, when it comes to
changing the nutes). But, they have poor colors, the
internal insulation is thinner, and the bottom is not
flat due to the roller wheels, which makes it difficult
to use a long or even a short air stone.
The
100qt cooler from Rubbermaid is another great option (I
suggest making a permanent stand for this one, cause it
would be a bear to move) This cooler has two lids, a
main one for the plants, and a smaller one off to the
left side - perfect for checking roots and filling. Also
comes in dark green, 4 plants will fit, but costs $40.
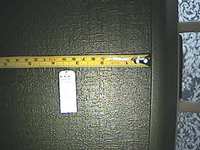
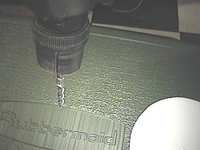
The airpump
The
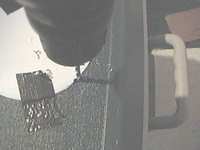
Rubbermaid has a small hole on the backside. First find
the hole under the lid, and use a small drill bit and
drill upwards thru it. Find the hole on top, and drill
back down with a bigger drill bit. Then just use a
scraper or knife to scrape off the edges. Enlarge this
hole by drilling.
The igloo should have two of
them, whereas the Rubbermaid has only one. I plan on
using only one air pump, rated for a 30gallon tank.
Cheap air pumps are louder, and that can be really
annoying, especially for a stealth grow. I?m using a
Whisper, but they are still loud IMO. I find placing air
pumps on the floor will create a vibration thru the
floor. If you have to use a pallet, then use one, and
place a towel on top of the wood, to help ease the
vibration down some. Don?t cover up the air pump though,
or this could lead to problems.
Don?t put the
air stone in until after all the drilling and the mess
has been cleaned up.
Construction:
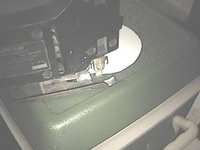
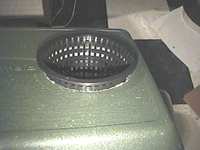
Net pots Now onto figuring out
where to place the 5? heavy duty net pots. You don?t
want them too close to the end, or too close too the
center, and they need to fit flat down onto the lid. You
want the net pots all the way down in this cooler, so
they will dip into the nutrients. The cooler lid is
around 2.5? thick, and if you ever have to move it in
the beginning, you don?t have to worry about water
pouring out the sides.
For this cooler, I
decided to make the center of the net pots at (for
both), 5 ? from the center, and that would also be 3 ?
from the outer ends, and 5? down from the back of the
lid. This will allow the net pots to lay flat.
Netpot holes
Now before making
the holes for the net pots, I went ahead and cut out a
plastic circle. It is just under 5?, and will be used
for a guide line. Reason for not being exactly 5?, is
because when I use the jig-saw, the blade will make it
the 5? that I need. I put tape on the plastic circles,
so they won?t shift when cutting them. I then trim it up
with a razor blade.
Check again to make sure the
net pots will fit securely, and fit close to top surface
of the lid.Remember to clean it out before continuing
on.
Also use some
duct tape (preferably water resistant tape) to cover the
inside of the edges where you cut the 5? circle out for
the net pots. Styro-foam (inside the insulated cooler
lid will be exposed) will fall into the cooler, and
water may work itself inside the lid, which can turn
into a not so clean cooler. I use a thick sticky black
electrical tape to line the holes, so installation won?t
fall out, and then lined it with water resistant duct
tape.
Netpot depth I want to make
sure, when the lid is closed, the net pots will go at
least 1" or 2" into the nutrient mix. After a week of
growing, the roots should be starting to drop down into
the mix, and then you can let the water drift a few
inches under the net pots, but in the beginning, I want
the bottom part of the net pots in the medium.


